A Bag for Liza

Dear Jasper and Kestrel,

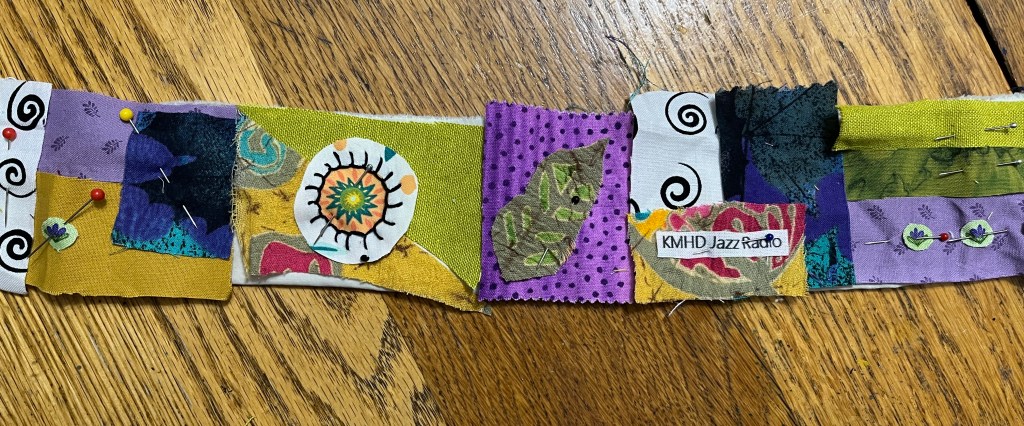
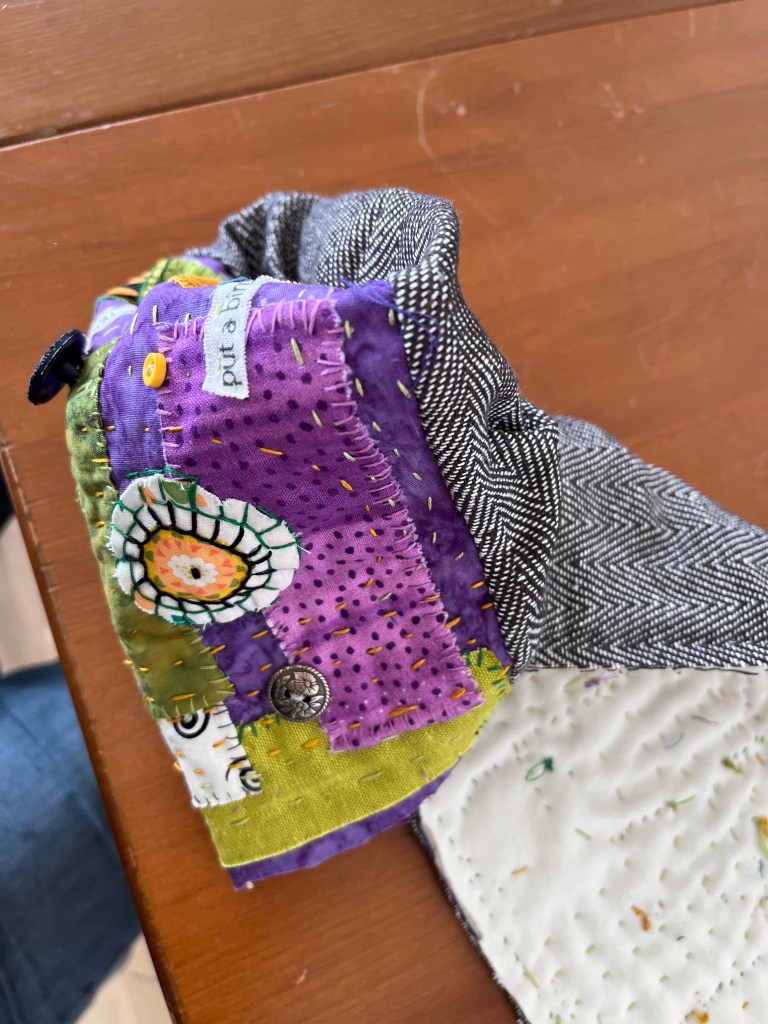
While traveling in Denmark, I had a hand-sewing project to keep me occupied when my tourist muscles were tired. I started sewing on it at the Portland airport.

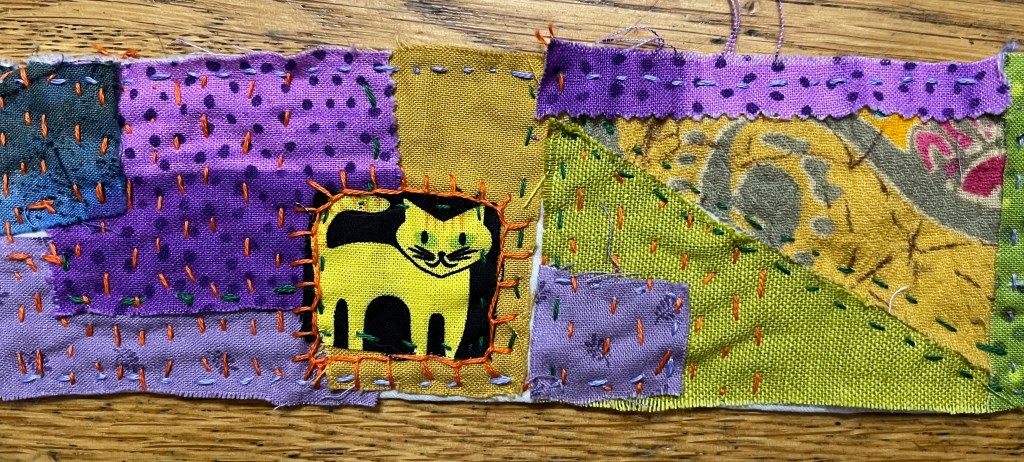
Being stuck in waiting areas is less frustrating if I have something useful to DO. So this made me very happy, stitching bits together and feeling the fabric grow under my fingers.

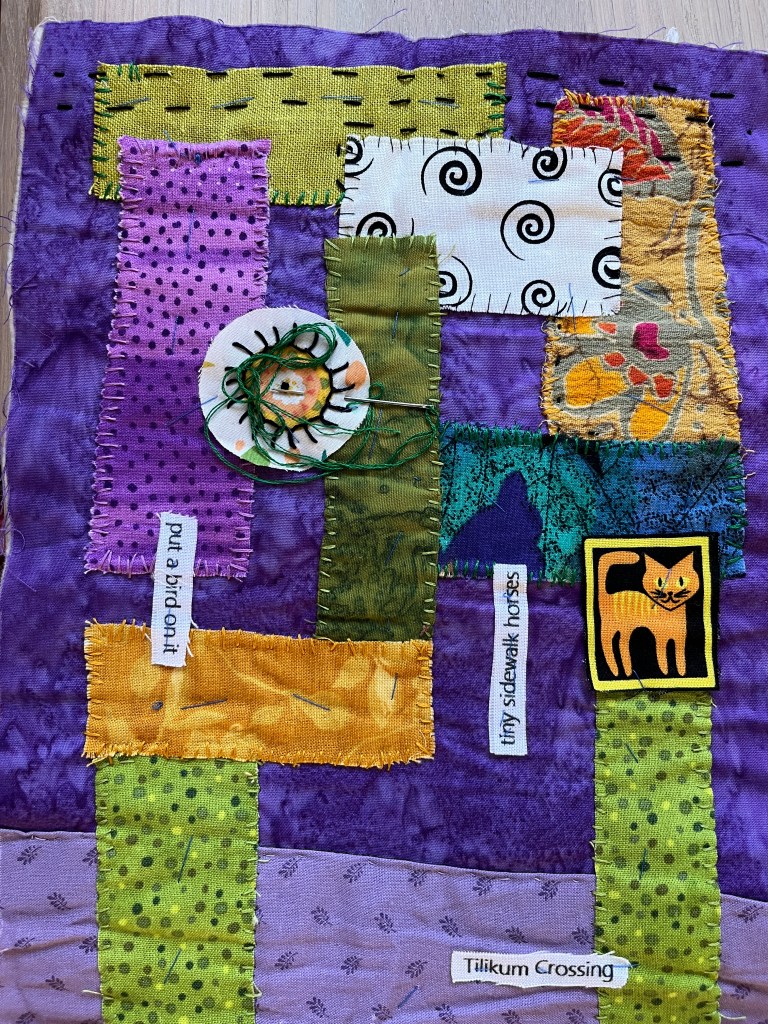
As I worked, I realized the fabric was getting thick, almost feeling like canvas. Was this going to work? Or was I accidentally making a brick?

Once I was in Denmark and finishing up, Liza helped me find fabric for the lining and drawstring loops, in the form of a kitchen towel from Bilka, the buy-everything store. I managed to get everything sewn together and lined. Usually, I would do this part on the machine. But hand-stitched was the way to go.

The loose weave of the towel was challenging, and felt very bulky. My confidence was slipping.

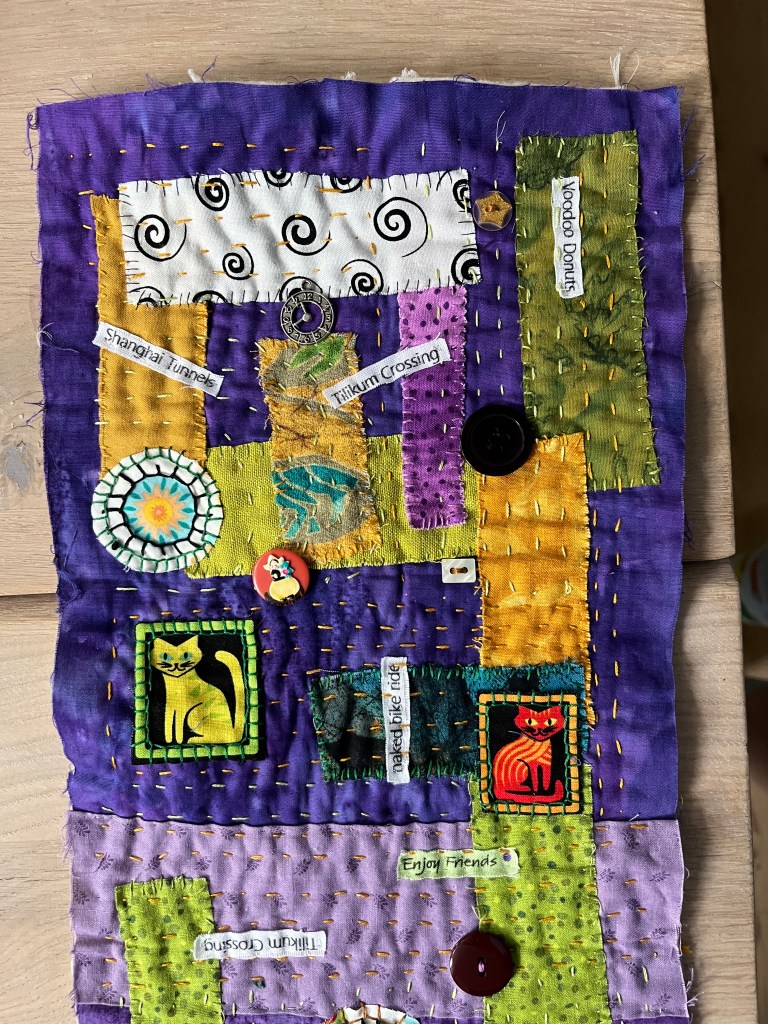
But once I got it stitched and all together (even with the weird narrow opening), it was, indeed, a functional bag.

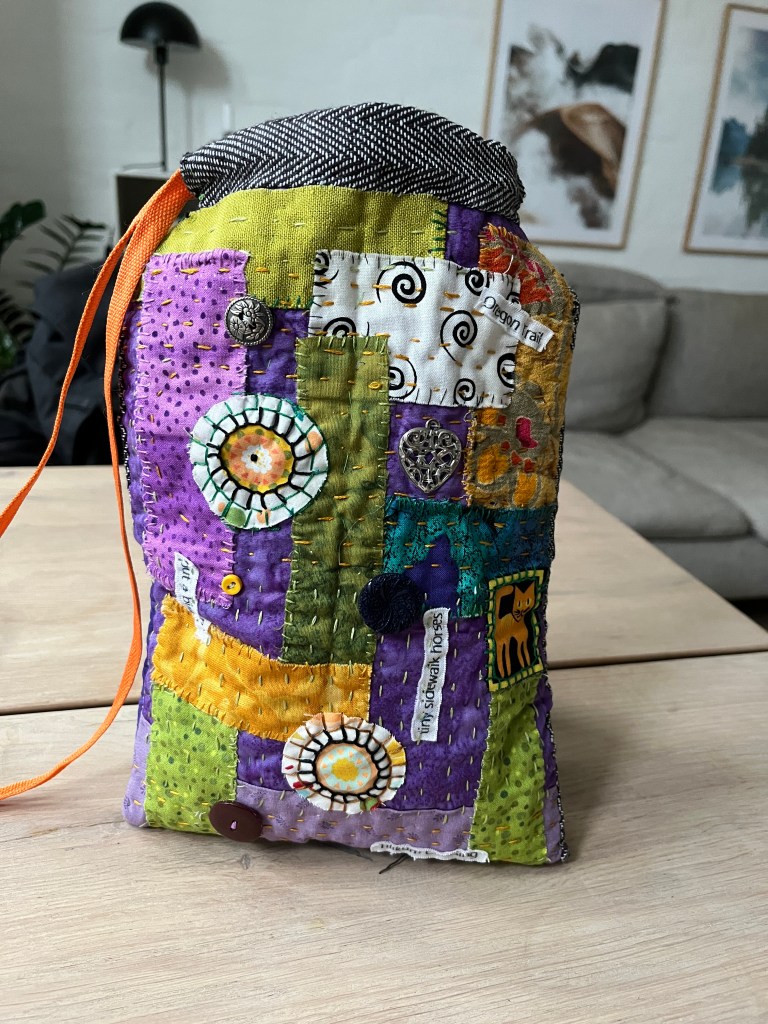
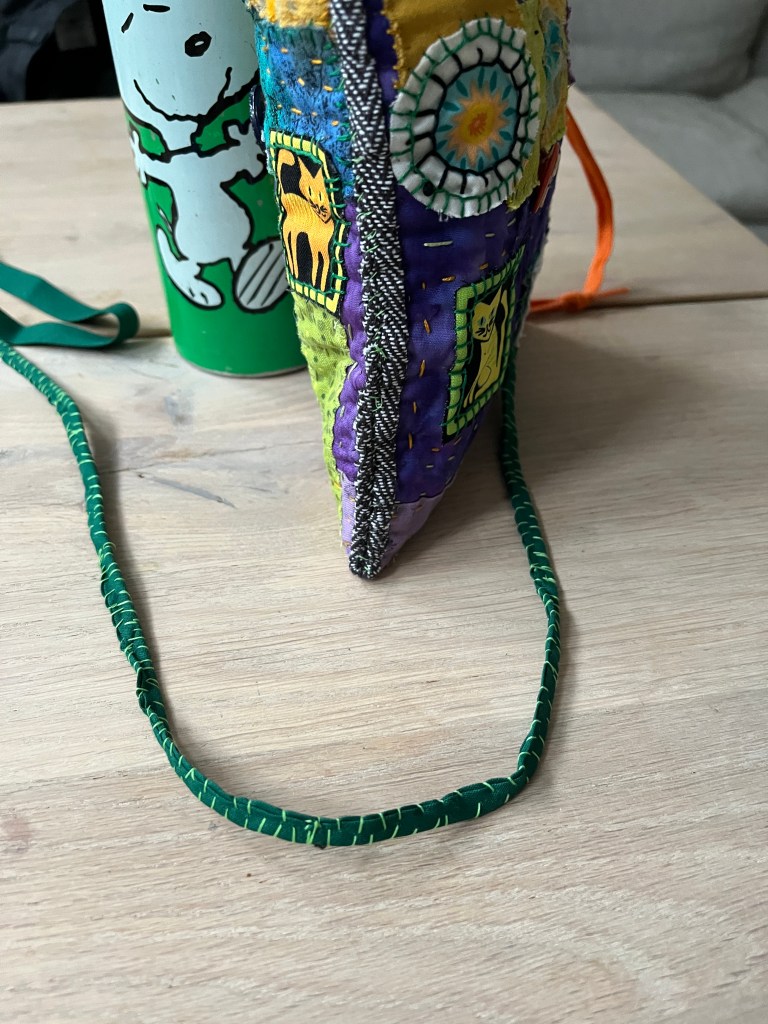
It has two different colors of drawstrings, one made of an orange shoelace and the other a stitched length of seam binding.

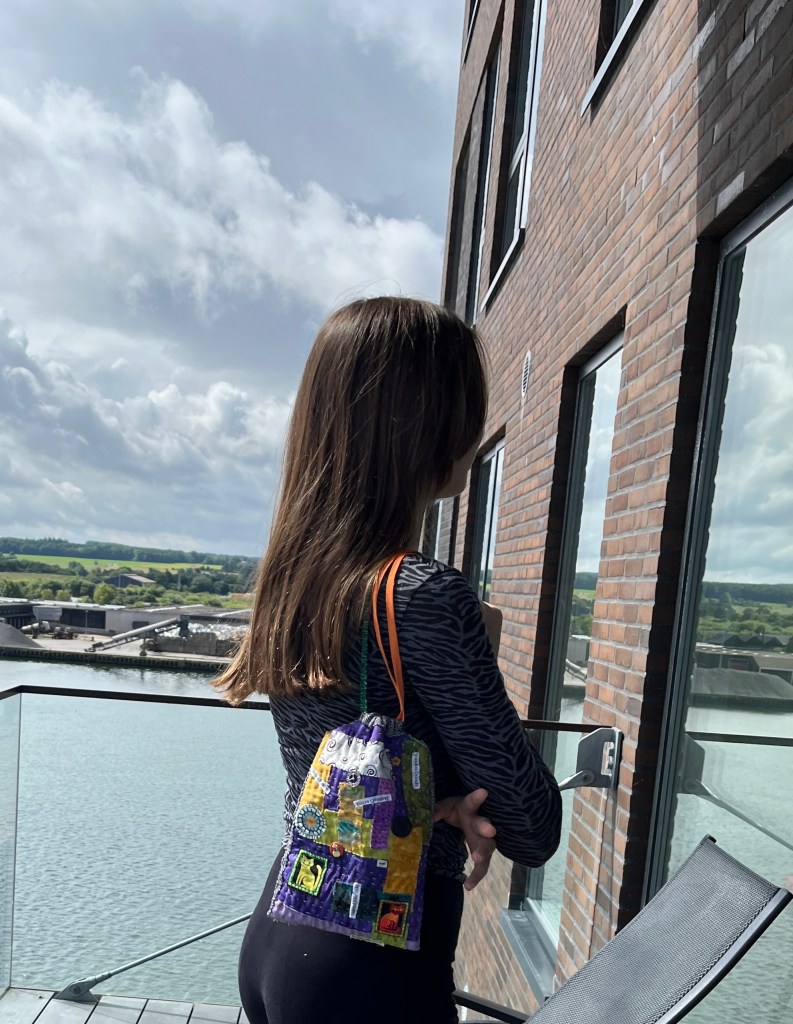
It is odd and quirky and Liza knows that, like her, there is nothing like it in the world.

I am glad that I got it done and was able to leave it in Denmark where it was intended to be.

Love,

Grandma Judy

Slow Stitching for the Adventure

Dear Liza,

Since I have starting drawing, painting, sewing, and generally crafting every day, I have decided that just SITTING on my long flight to Denmark this summer would be a real waste of creative time.

I started up hunting up new hand-sewing ideas and found videos on “Slow Stitching” which looked easy enough to do on a plane, but new and interesting enough to keep my brain busy.

The process is a sort of fabric collage, and some of the stitching is like the Kawandi stitching I learned a few years ago.

First, I chose my colors, which Auntie Bridgett calls “The Scooby-Doo Palette”. I made a sandwich of old sheeting, felt, and my purple background for a nice thick surface to work on.

I watched YouTubers Jo Peaceofpi and Daniela Mellen and got directions and inspiration, and am working on something that I hope, by the end of our trip, will be a gift for you. The piece is about 7 inches wide and 20 inches long.

I cut the colors into rectangles and starting laying them down, not being too fussy, but looking for a good balance. Some slow stitch pieces completely cover their background piece, and others let it show between the patches. For this one, I am going to let it show. I pinned, then basted, the pieces so they would stay where I put them.


I used some embroidery floss to stitch around the edges of each patch. These will all get done before the running stitches get put in. And yes, in Slow stitching, the edges are left raw. It will be fun to see how it turns out.

Then I took my first few rows of stitching, to make sure I knew what I was doing and liked how they looked. They looked like they were supposed to. Hooray!

I collected some buttons, bits of fabric, needles and embroidery floss, and little school scissors into a traveling pouch for the trip, and rolled up the piece into a nice-sized scroll.

Now I can put the whole thing away in my carry-on bag to be taken out somewhere over Canada! I feel like I am giving myself a present with a “Do Not Open Before Take-off” sign on it.

My brain is so happy! See you soon!

Love,

Grandma Judy

Practice Slow Stitching

Dear Liza,

I love learning new things, and this week I have been all about Slow Stiching. This is a new name for combining old hand sewing techniques like embroidery and quilting, and I am loving it.

I have got a project set up to do on my flight to Denmark, but I want to make sure I know the ins and outs before I start it at 30,000 feet.


So I am practicing! I am making a 30 inch long, 3 inch wide strip, quilted, appliquéd and embroidered. I am not sure what I will use it for, but something will come to me. Wall decoration? Head band? Ridiculously long book mark?

Anyway, I am enjoying the act of embroidering, playing with colors and patterns, and feeling the textures grow under my fingers. There may also be buttons, beads, and other goodies as I go along.

I am learning how this sort of project works. A few things I have learned:


*** Keep about half an inch of overlap so there are no gaps between patches.

*** Use a single strand of thread of a light color to sew patches down if you plan on adding more layers of stitching, so it doesn’t distract from the patch.

This is how it is looking so far, on the front….

And on the back.


Maybe I’ll bring this one along with me, and we’ll figure out what to do with it!

Love,

Grandma Judy