The Art of Figuring Things Out Part 2

Dear Liza,

Once all the heart ‘insides’ had dried and gotten solid, it was time to cover them. Ruthie suggested card stock, but I was worried that it would be too stiff to go around the curves.

I tried regular paper. I cut a strip an inch wider than the heart, and drew a line a half inch in from each edge, so I could clip the paper, like you do fabric, to make flanges on the curves. I spread some Mod Podge around the edges of the heart and went to work.

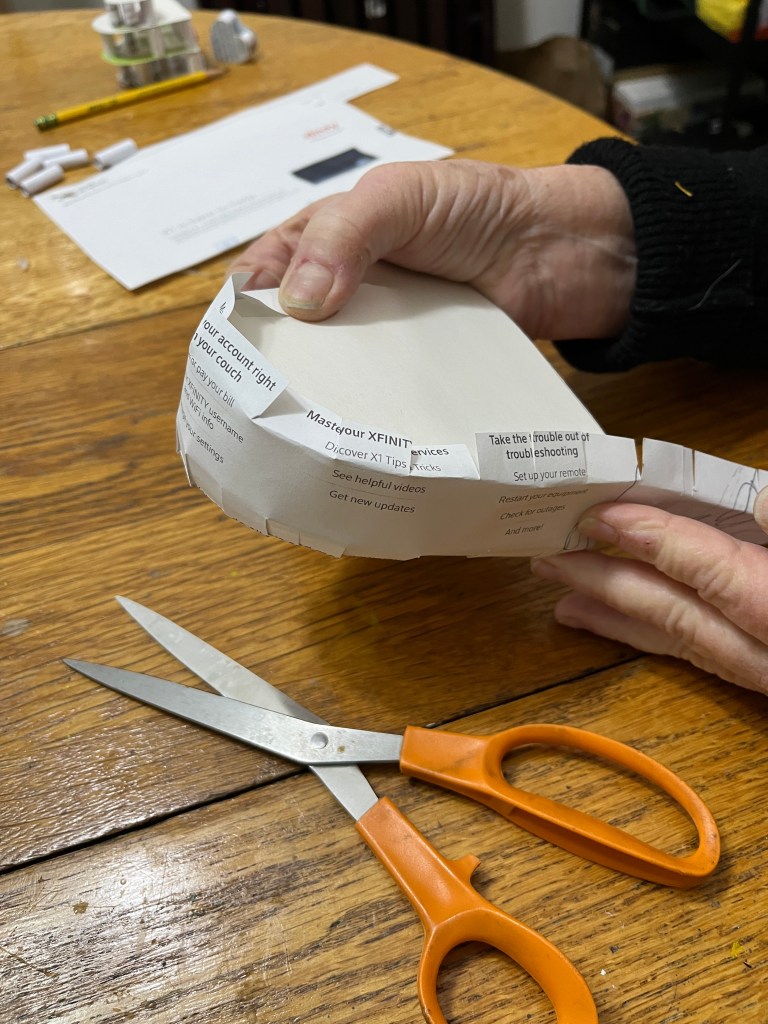
It was a bit fiddly to hold the paper to the glue for just long enough to adhere but not so long as to stick to ME, but it all worked out.

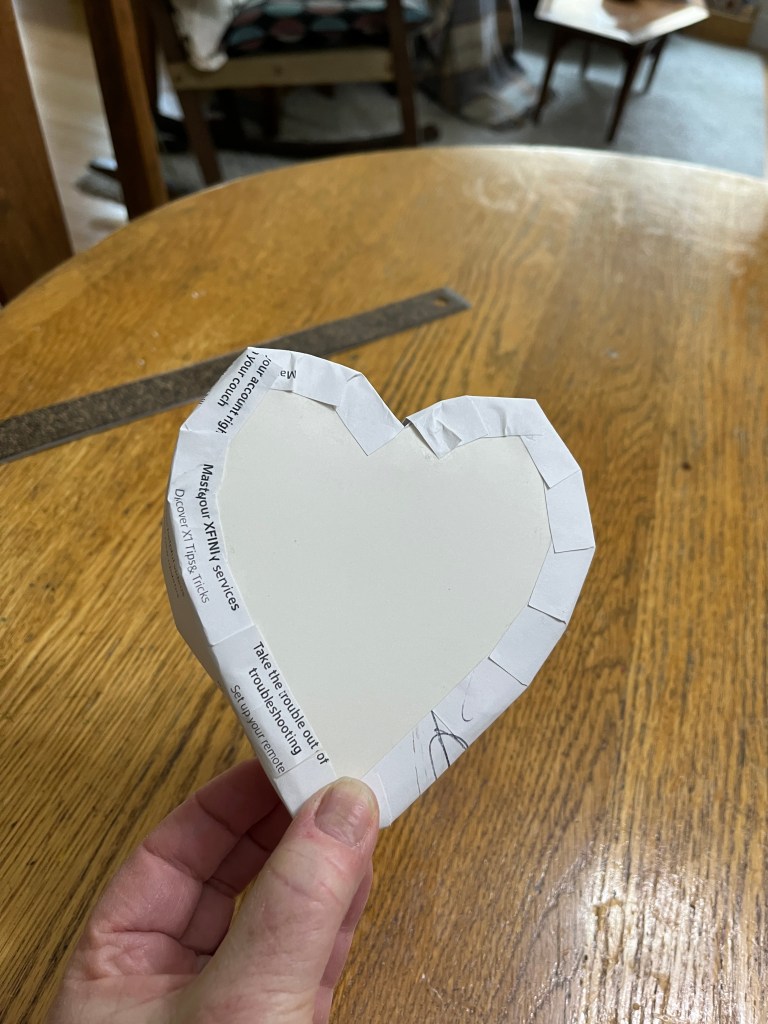
And where the strip of paper came up a bit short, it was easy to patch.

I got so carried away that I did three of them in a row!

I will show you the last steps once I have done them. I’m figuring this out as I go along.

That’s the whole point!

Love,

Grandma Judy

The Art of Figuring Stuff Out Part 1

Dear Liza,

My artist friend Ruthie Inman had a fun idea at our last Zoom class. She showed us some three dimensional artworks she found in the Internet, and told US to show HER how to make something like it.

I loved this structure that looks to be about 6 feet tall and made from metal, shown in a museum. I have searched the internet and cannot figure out who created it or where it is on display.

Bridgett and I talked about it, and came up with one way to reproduce it in miniature, out of common materials.

Tea boxes and scissors, paper strips, three different sizes of heart shaped cookie cutters, Elmer’s glue, and a pencil were my supplies.

Step one: Each heart in your structure will need two hearts of the same size. Trace the cookie cutters onto the tea box cardboard and cut out.

Step two: Cut strips in half inch, three quarter inch, and one inch widths. They should be about 4 inches long. Roll the strips around a pencil and glue the outside end down so it stays rolled up. You will use the longest pillars for the largest hearts.

Step 3: Lay a heart down and make small puddles of glue at close intervals. Stand each paper pillar in the puddle.


Step 4: Put glue around the edges of the top heart, rest carefully on the pillars to line up with the bottom heart, and let dry. A small weight might help them stick.

Leave the insides to dry until you figure out what comes next. Stay tuned.

Love,

Grandma Judy

Makin’ Boxes with Ruthie

Dear Liza,

My friend Ruthie Inman is always finding new ways to challenge our little zoom art group. This week she asked us to get a cream cheese box so we could cover it and make it pretty and useful.

The silvery coating on the box was very slippery and needed lots of gesso before it would take any paint. My first idea was to paint the whole thing bright orange and then collage over it. I didn’t take a picture, but trust me, it was awful.

I asked YOU and you said i should paint the whole thing black and figure out what to do next. So I did, and here’s what came next : really beautiful paper cut into teeny tiny bits.

I love mosaics, and black always looks good between bright colors. I got the top covered while Ruthie, Zoe and I chatted.

And to make the inside pretty, I found some gold foil (it came wrapped around pears at Christmas) and cut it to fit the bottom of the box.

This box still isn’t finished…. The black parts aren’t pretty and it needs a clasp to keep it closed.

And speaking of works in progress, I did another experiment with boxes… this time, a Yogi tea box. I was thinking of using it instead of the cream cheese box.

But as I held it, it felt too flimsy to be of any use. maybe I could reinforce it? I pulled apart the glued corners and laid it flat, laid tissue paper over the whole thing, front and back, with Mod Podge medium, then put it back together. It is stronger, but is still in its slightly-lumpy-tissue state.

But fear not. All will be well…and if it isn’t, I am only out a few cents of Mod Podge.

I am so glad I get to do artsy stuff with Ruthie!

Love,

Grandma Judy

More Collage-a-Person

Dear Liza,

I have not been doing as much art lately, because I have been doing more prep work in the garden allotment. But for my upcoming birthday, Grandpa Nelson got me a nice new jar of Mod Podge , so I felt inspired.

Saint Sweet Sophia of the Golden Pear Salad

I grabbed a few Better Homes and Gardens Magazines and started pulling out pictures. Advertisement photographs joined with plates of food and other bits and pieces got put together to make some unlikely icons.

San Miguel of the Root Vegetables

As I was trimming and gluing the pieces down, my imagination started creating the names of these unlikely Saints.

Saint Stevie, Defender of Social Distancing

Needless to say, I am having way too much fun with this!

Love,

Grandma Judy