Evolution of a Collage

September 30, 2025

Dear Liza,

I needed to make a cover for my new Journal, and I wanted a collage. It’s a good size, 9x 12, so I had plenty of room to play with. I found a heavy tag backing from an old watercolor tablet to use as my base.

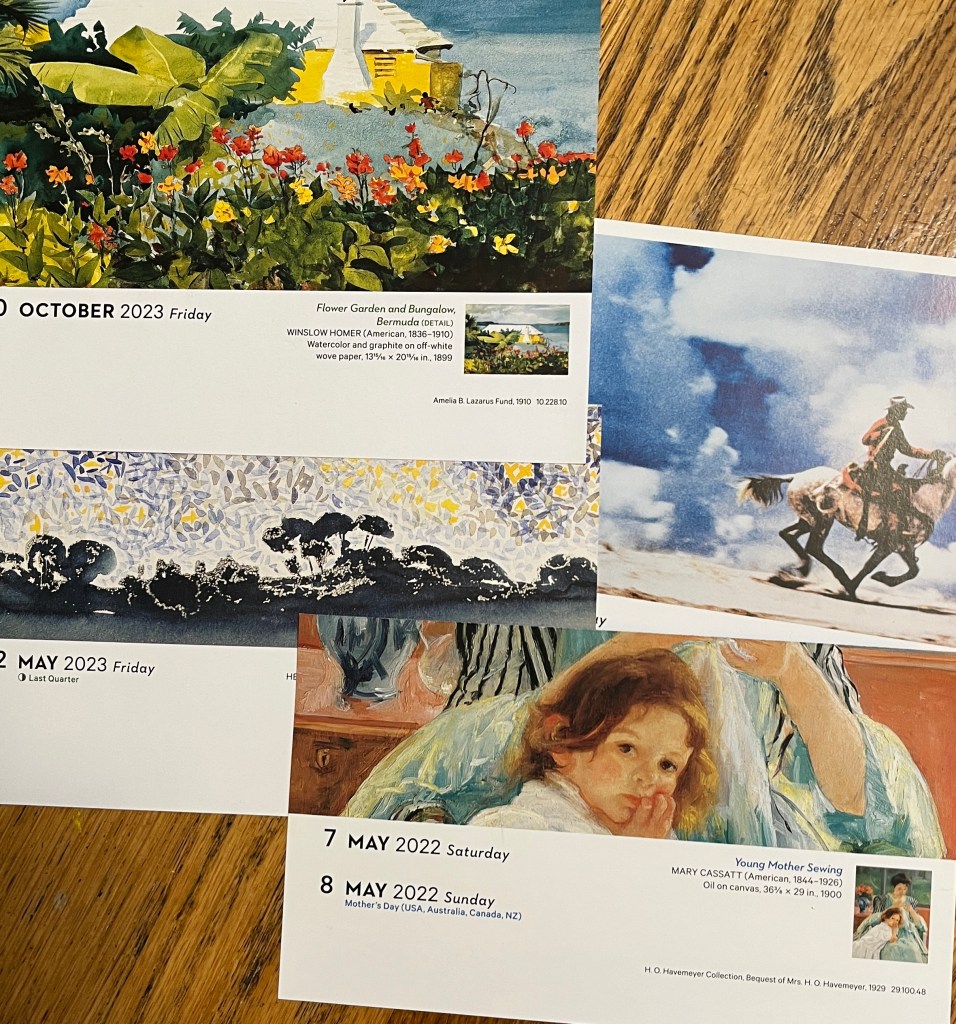
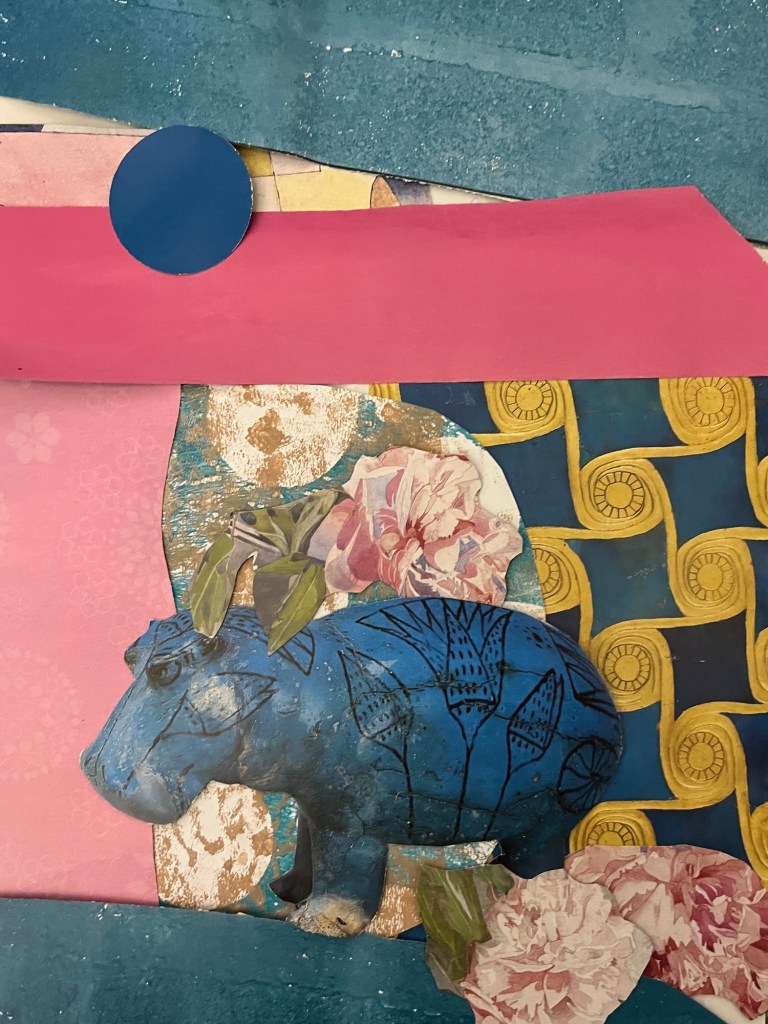
First, I pulled tons of colors and images from my collage boxes and Jennifer Coile’s gift of museum calendars. I trimmed them and laid them down, seeing who played nicely and who didn’t.

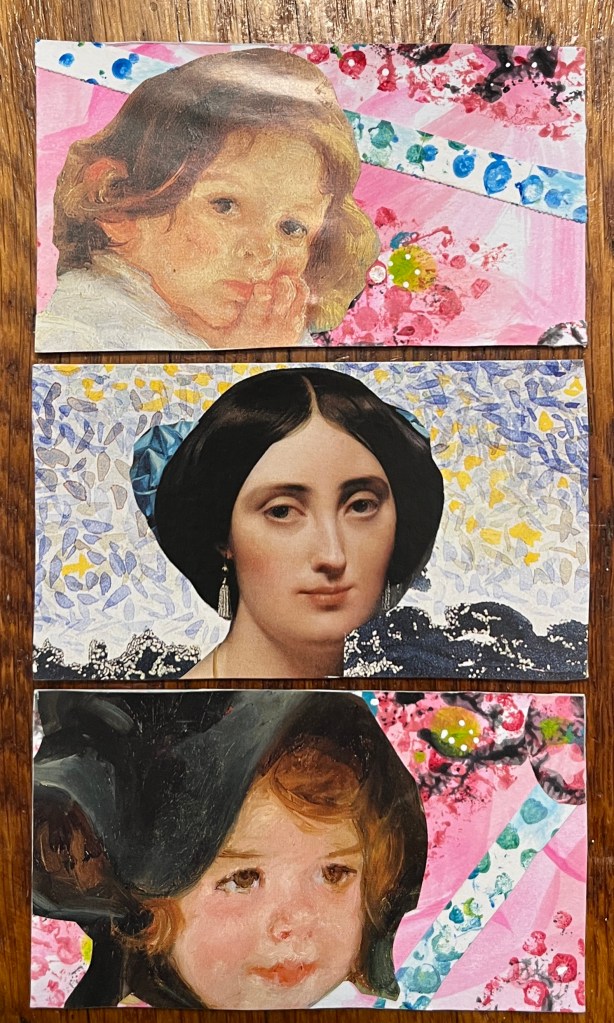
This is always a long process with lots of internal dialogue. I will make a decision to include a piece… in this case, that impressionist woman, and it takes a long time before I admit that it’s just not working. She was both getting lost and cluttering up the picture.

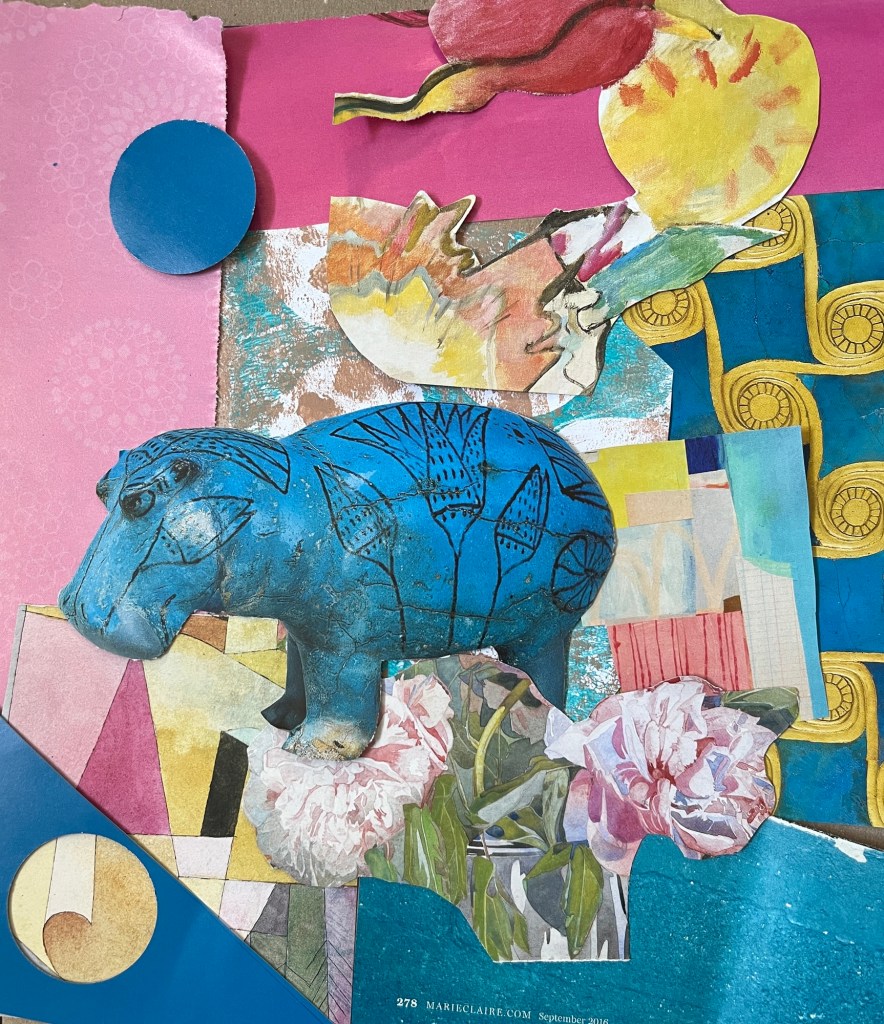
So, in goes the Egyptian hippo. Better, clearer, more focused. Still too many images. Pull them out. But where do the flowers go? Up, down? More discussion.

Every piece is chosen, placed, stared at, accused, forgiven, moved and shifted.

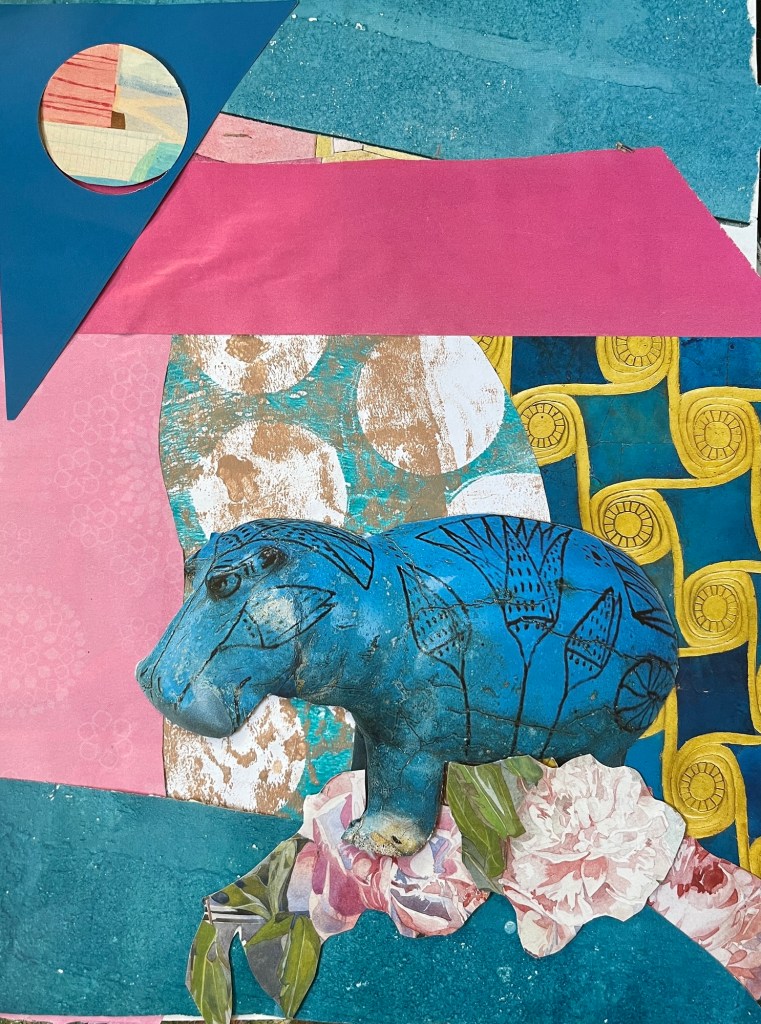
The last bit to be decided was the sun ( or moon). I wanted the blue to balance the bright hippo, but it looked too heavy. The circle cut from a rejected paper worked well, and the blue triangle set it off.

When I had stared more, had lunch, looked again and still liked it, it was time to glue it down. I went in sections, the top stripes together first, but not to the base paper.

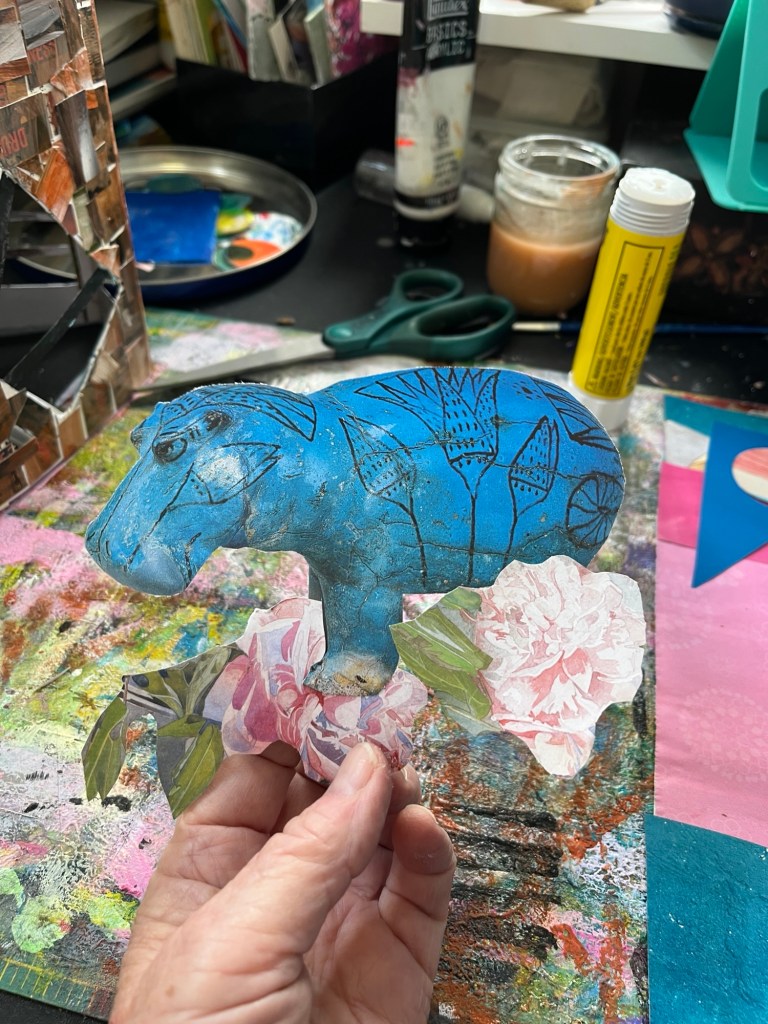
I glued the hippo and flowers together, but not down yet. This makes placing the focal points less nerve-wracking.

When I was finally willing to commit, it all went together quickly. UHU glue stick, tweezers (so my fingers don’t get so gluey) and voila! Done!

After dinner I came back to admire it, and realized it wasn’t done yet. It felt stagnant. I decided to sleep on it.

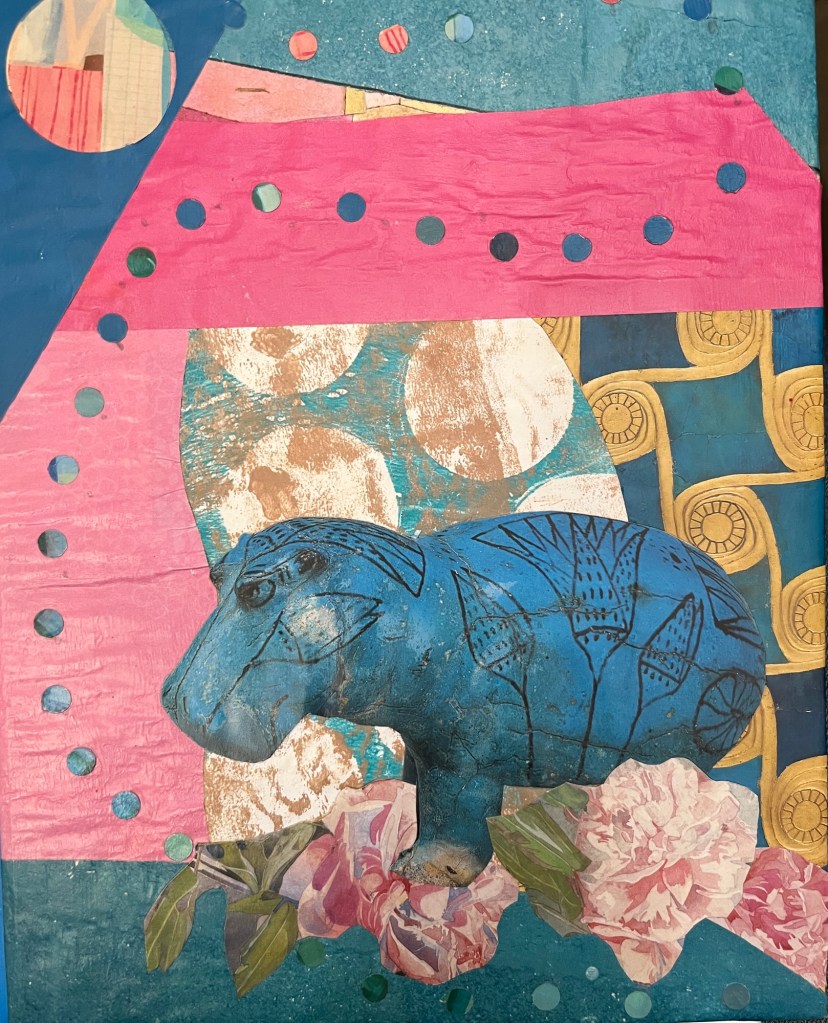
By morning, I realized it needed a bit of movement. Again reaching for papers that had been put aside, I punched small dots and used a piece of string to figure out the line I wanted, and glued them down.

Now it was done. A coat of Mod Podge for a top coat and all was ready! Once it was dry I used Mod Podge to give a good adhesion between the heavy tagboard and the original, floppy journal cover. Under heavy books for a few hours, then out to finish drying, and it will be ready by the time I need it.

And this concludes our tour of the creative process.

Love,

Grandma Judy

Artist Trading Cards

Dear Liza,

I have found a new kind of art to make, and even a group of people to share it with! Ruthie Inman’s ZOOM art group includes Zoë, a delightful lady who lives in Tasmania, Australia. Zoë and Ruthie both make ATCs. That is, Artist Trading Cards.

Artist Trading Cards are little pieces of art, 2.5 inches by 3.5 inches. They can be painted, collaged, drawn, just about any medium you can imagine. You make them, then mail them to friends, who mail you theirs. It’s like having artsy pen pals!

I used a few failed Valentines, but mostly clipped bits from the art calendar Jennifer Coile sent me.


I made my first ATCs using Auntie Bridgett’s old business cards as backing, then realized that they are a half an inch too small for the ATC trading rules.
They are just two in he’s high and 3.5 inches wide.

But that’s okay! First, because I don’t think art should have rules; and second, because I can still send them to friends who don’t care about the rules.

But for my second round, I’m doing something different. I laid out rectangles of the right size, and made six ATCs at the same time, with bits overlapping.

I glued bits of art down, then gave it a quick smudge with white paint to soften the colors. I really like them, but they need something… I’ll show you what, tomorrow!

Love,

Grandma Judy

Makin’ Boxes with Ruthie Part 2

Dear Liza,

As we have often agreed, learning curves are a good thing. The first of anything that we make is rarely the best… it takes experience and time to get the hang of things.

Languages… Rock Climbing… and crafts.

A few weeks ago I started making decorated boxes with Ruth Inman. I struggled a bit with shiny surfaces and flimsy cardboard. I even took a tea box apart to try and strengthen it.

I trimmed the too-deep, too-fragile Yogi tea box down and gave it some reinforcement with tissue paper and a strip of cardboard around the top edge.

Today was another Art Zoom. Zoe, (who isn’t quite awake yet because she lives in Tasmania and it is 6 A.M. there) , made such a wonderful box that I needed to take a picture. She used Velcro as a closure for her box, and put a nifty ribbon and stick contraption on the outside to look pretty.

I got inspired, so while we were chatting, I pulled out some wire and made a hasp. It wobbled around a bit, so I anchored it with glue and thin paper straps.

I need to let the glue dry before I do the next part, which will be to push the hasp through the hole and slide a tiny twig through to lock it.

I love learning new things! Some things, like languages and geography, make the world more accessible. And others, like crafts, just make it more fun!

Love,

Grandma Judy

This Week’s Media Mix-up

Dear Liza,

My friend Ruth Inman gave us an odd list of things for our mixed media challenge this week. Threads pulled from fabric. Large envelopes. And a ‘page extender’, a flap or a fold-out section to make the page bigger.

As usual, I read the list before bed, so my brain could be working on it while I was asleep. I have a very self-motivated. brain, I guess, because when I woke up I knew just what to do.

Since I have been obsessed with trees lately, that’s where I headed. I drew a hillside with watercolor pencils and pulled some threads from some grey and brown fabric and slowly built a winter tree trunk and bare branches. This was tricky, because after a while the thread wanted to stick to my glue-y fingers instead of the paper, but I slowed down and got it all where I wanted it. I love how it looks and feels. Very nubbly and bark-Ish.

Wintry tree with Fall flap just showing

Next, I taped down a flap that would be the Fall part of the tree, and started putting on the orange and brown leaves. I used crumpled pages from magazines and an old Manila envelope.

Wintry tree with Fall flap

I realized that my tree was going to be pretty stumpy on top, so I taped yet another flap on and kept adding leaves until I was happy with the height. I needed to leave a slight gap so the page could fold.

Fall tree gets an extension

Of course, a taller tree needed taller branches, so more threads got added to the Wintry tree. This sort of unexpected drift of a project can be frustrating, but is also exciting and fun, adjusting to what is needed.

This project ended up taking longer than I thought, because I had to wait for layers of glue and paint to dry, and having two flaps instead of one! Here is a picture to show how it is put together.

This website won’t post videos, but I have put one on my Judy Drueding Facebook page to show how the flaps open up. Go take a look! And if you don’t do Facebook, write me a comment and I’ll send it to you.

Have fun making art!

Love,

Grandma Judy