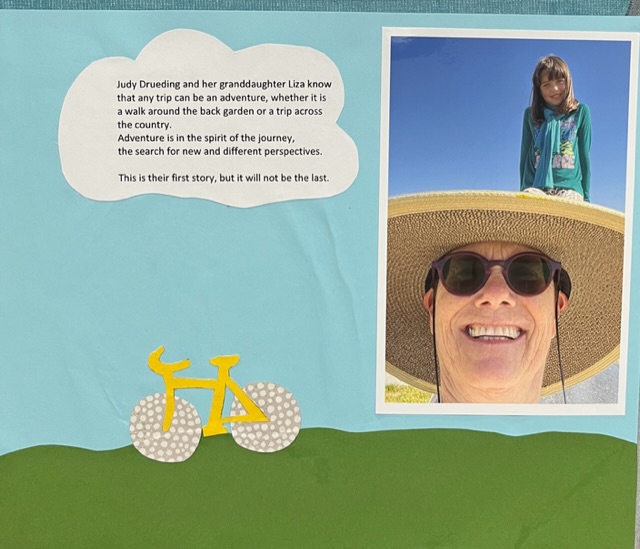
Our growing season is over here in the suddenly chilly Northwest. I put the garden to bed last week, and now I have written my last Garden Journal entry.
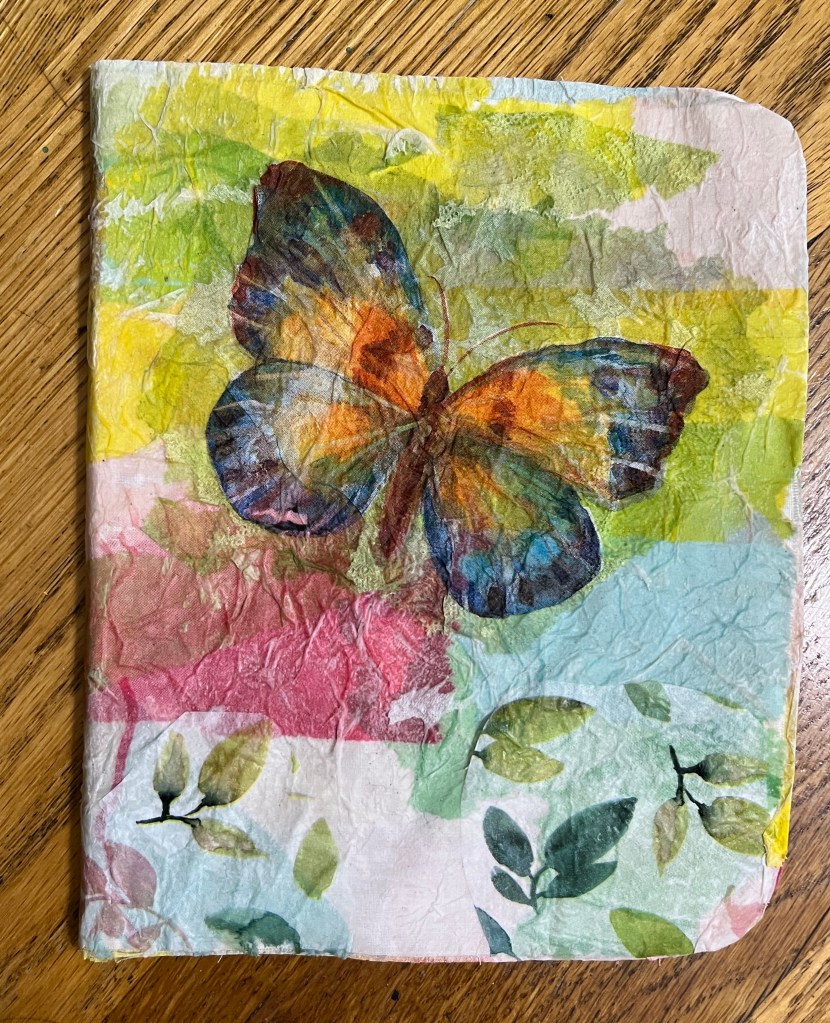
I made this year’s Journal out of an up-cycled movie list book, re-working the covers with collage. It seems I made fewer entries this year than last… am I running out of things to say about the garden?
I played with a lot of different media this year, anyway.
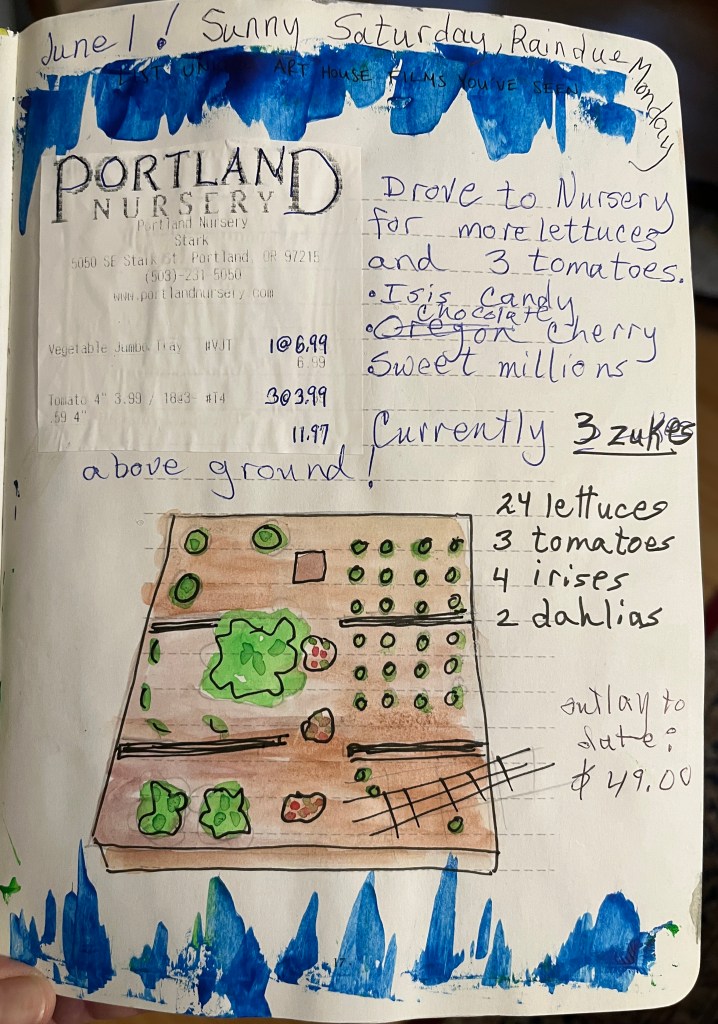
I watercolored the layout, both as I planned it to be…
and as it turned out.
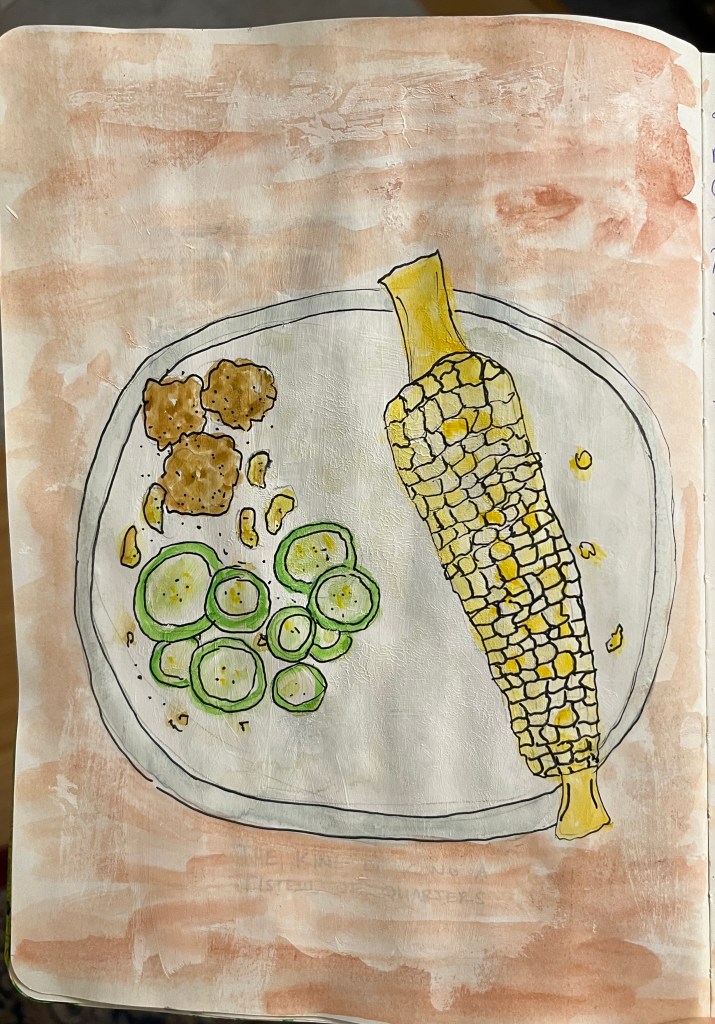
I used collage when I wanted to show beauty but had no garden…
… and watercolor when I knew exactly what I wanted to show, in this case, how the first zucchini ended up.
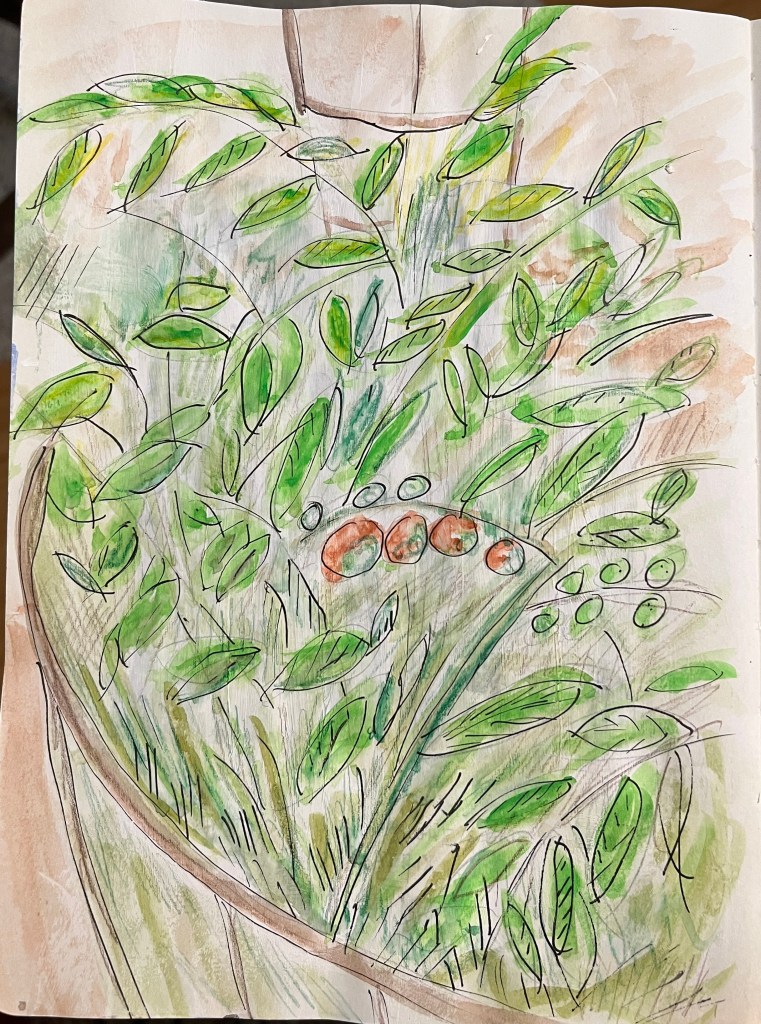
I challenged myself to show the complex form of tomato plants.
And, sometimes, I just played with color.
I’ll be out of town for a big chunk of the next gardening season, and I’ll make another Journal when I get back. We’ll see what happens then.
I am still playing in the journal Ruthie Inman got me started on a month ago. The cover is made of tissue paper built- up on fabric with thinned white glue, and has these pinks and greens.
I got quite a few of the pages done,
and then it was time to sew it all together. Using the awl and thread Ruthie sent me last year, I followed her directions and pierced and sewed the pages into the cover.
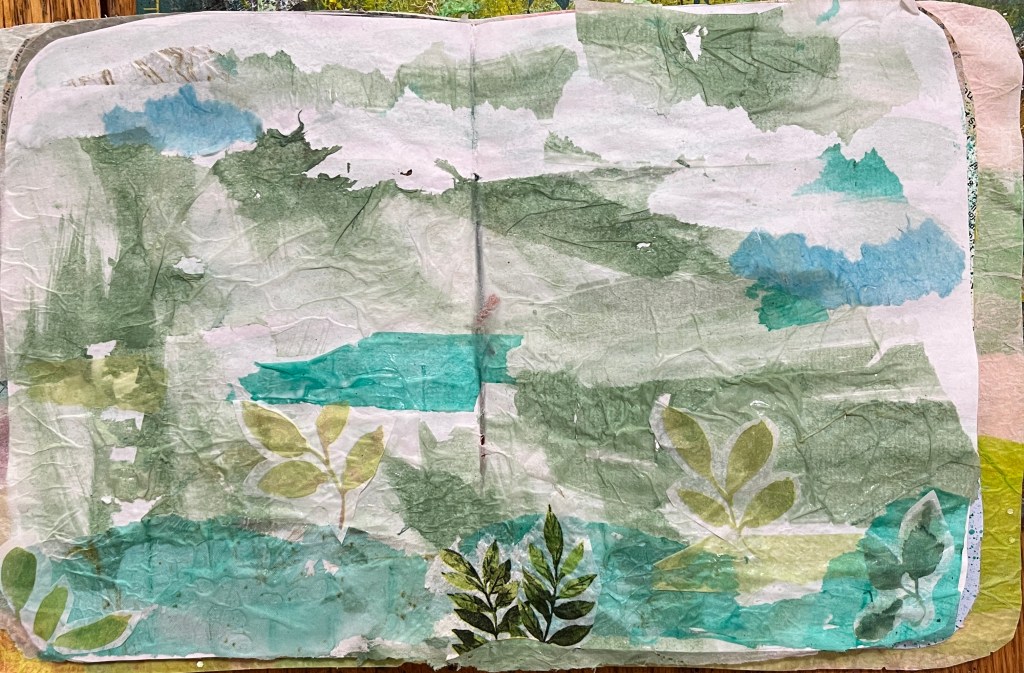
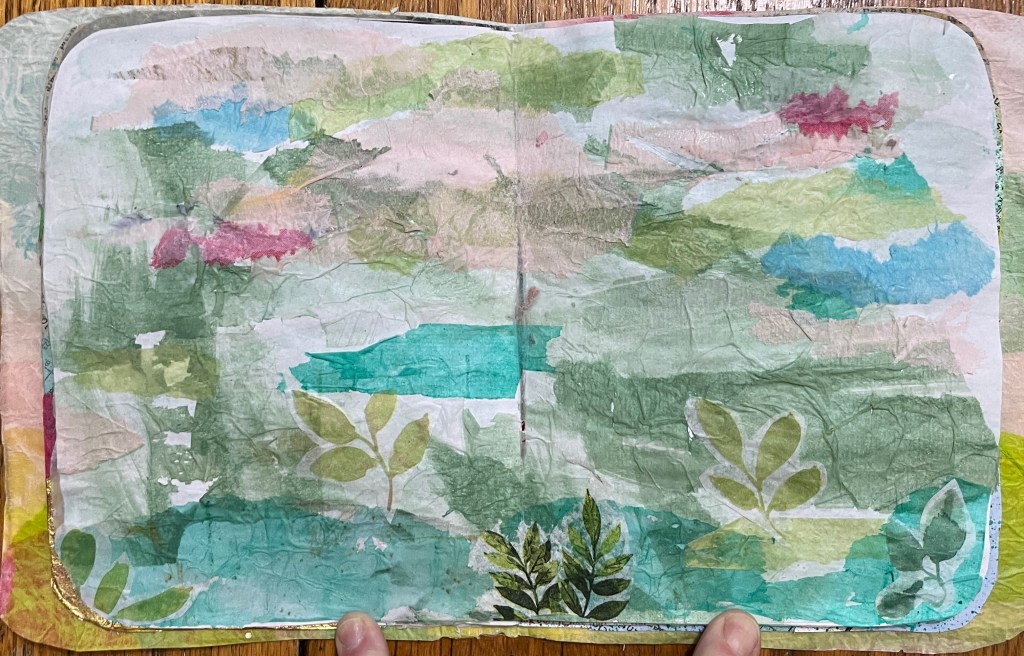
But I still had the center pages, the double page spread, completely blank. I wanted it to reflect the soft pinks and greens that are in the rest of the book, but couldn’t find collage materials I liked.
Finally, I painted them myself, using watered down acrylic paint. A sea green and a phthalo green gave me the look I wanted.
I kept building up layers of tissue paper, tissue leaves from napkins and such, trying for a sort of dreamy landscape look.
Then I made a mistake. I thought these pink worm-like bits of magazine paper would fit in, so I glued them down. The next morning, I realized that they were a bad choice. It took a few days for me to figure out how to fix it.
I got brave and used an exact-o knife to trim to awful pink bits away and repair the scratches with bits of deeper pink tissue. I like that every layer shows the layers underneath.
Now I have the dreamy landscape I wanted. I might find something else to add to it, someday. But for now, I love it.
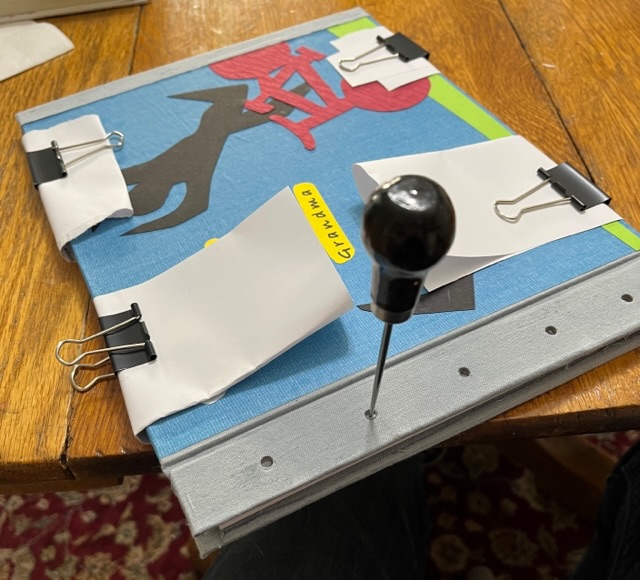
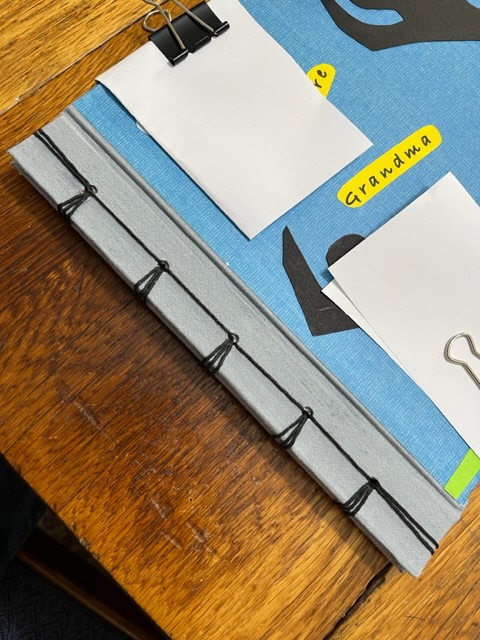
Your book is finished!! Two solid days of being snowbound in Portland got me focused and brave enough to get it done.
After using a heavy grommet punch to put holes in the fabric covered spine, I clamped the pages, illustrations, and covers together. Ruthie Inman had sent me a whole book-sewing kit as part of her continuing role as “Judy Nudger”, getting me over being afraid of new things.
It must have worked, because here I am!
Using the awl from the kit, I pushed and twirled through all 70 pages, then started sewing! This is a technique called Stab Binding, and it was wonderful! I watched several YouTube lessons, then made up my own pattern.
I had been looking forward to this part, and it didn’t disappoint.
How satisfying to put the whole project together with my own hands!
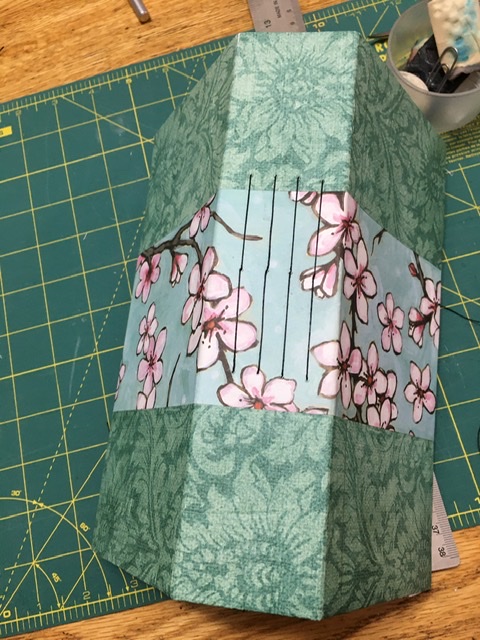
This week in our Tuesday Thursday art group we are starting a new kind of book. It is called a Concertina book because it is folded like a Concertina, or accordion.
Ruth Inman, as usual, is our teacher. The supply list for this project was long because it is a multimedia project that includes an old book, fabric, and an endless list of possible collage materials.
First, we separated the hardcover book from its covers with a sharp X-acto blade.
Then, after some careful measuring, we made the Concertina part by gluing pages together and giving them a sharp crease in exactly the right place.
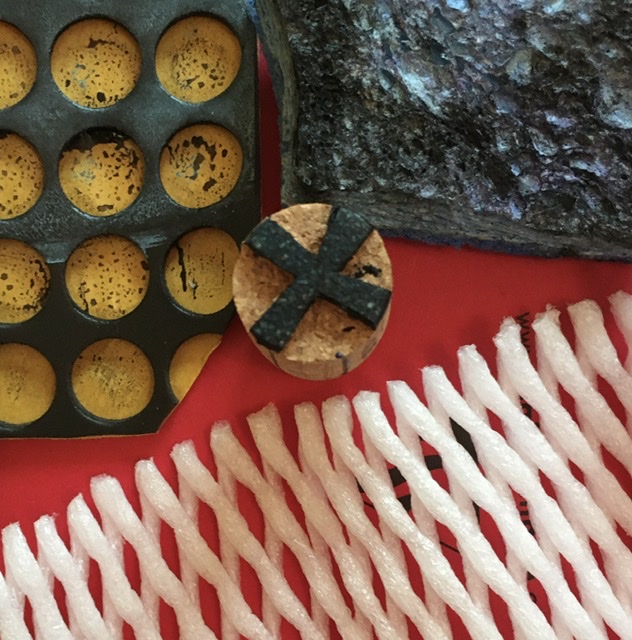
Since this book is going be all black and white, Ruthie showed us ideas for making interesting patterns…
And we let them dry while we chatted about other things to use for patterns.
I used black acrylic paint and the spongy wrappers from our Christmas fruit, cut up meat trays, a carved wine cork, and an old kitchen sponge.
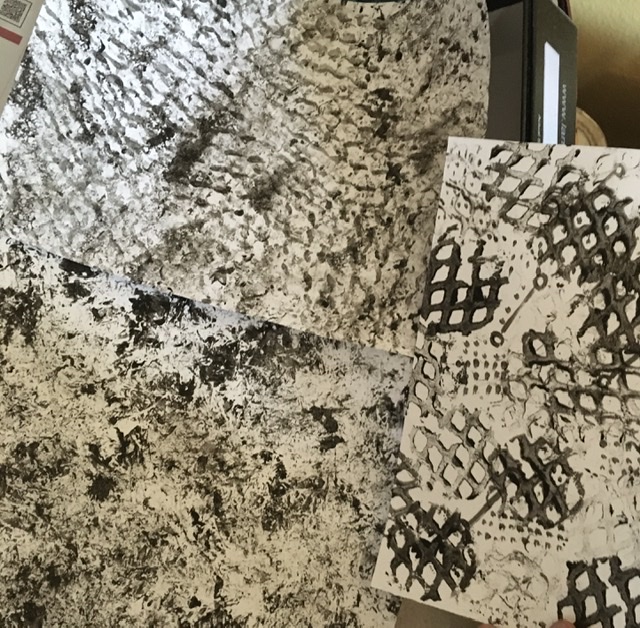
We needed to let the first two-page spread dry before adding any more. I was mostly happy with it, but when it was time for the second two-page spread, I decided to use more black and white, with less grey. You can see how many different ways a black and white page can look!
Spread number 1Spread number 2 (for now)
I like it, but there will be lots more added before it is all done. I will show you the finished product…um…. when it is finished! So there.
Your great uncle, my oldest brother Tim, is having a birthday next week. After enjoying making an Art Journal for myself and a book for my friend Pat, I decided to make a book for him, too.
Tim is eight years older than me, so even though we grew up in the same house, we were at different parts of our lives at any given adventure. He taught me to climb trees, fish, and change the oil on a car. He joined the Marine Corps when I was 10 and retired when I was 40. He was, and still is, a rascal.
So I decided to remind him of some of our childhood adventures. I chose six to include and did a bit of writing and illustration for each. They are silly and short and should tickle his memory.
Trees played a big part in our childhoods. Climbing them, mostly, to test our wits and have space to ourselves.
Of course I included Momma’s recipe for Heavenly Buns, her go-to quick lunch that fed about a million neighborhood kids.
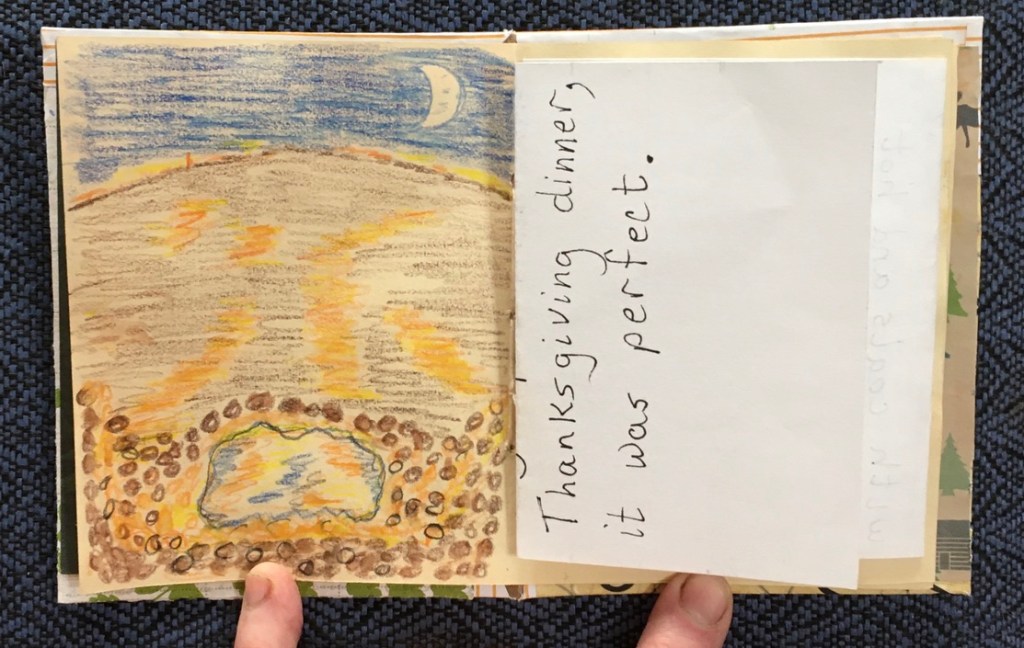
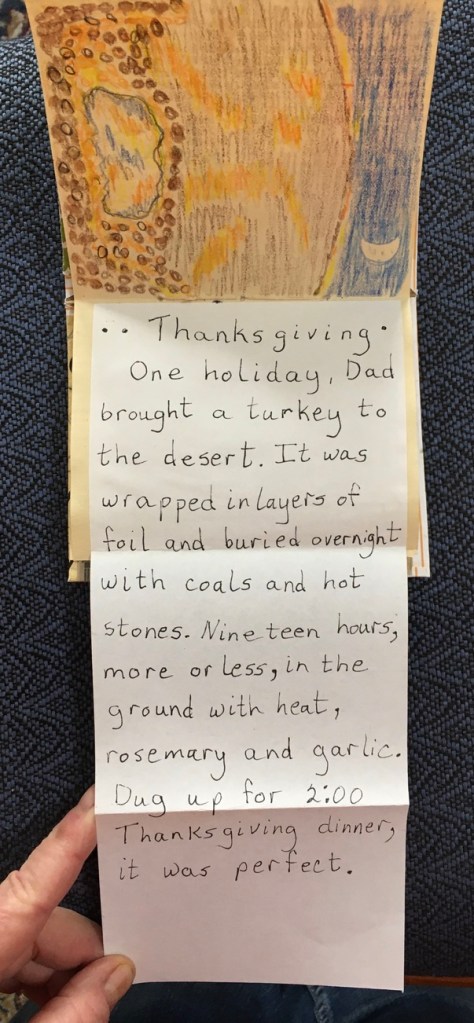
Camping and learning about outdoor living was an every-weekend activity. We learned about making fires, cooking in cast iron dutch ovens, and, one Thanksgiving, burying a turkey in the ground with coals and hot stones. “I bet it’ll work,” Dad grinned. He was right.
Since I had made the book small to fit in Tim’s pocket, but wanted to tell longer stories, I got creative about the page design. Accordion folds and other devices let me fit the stories in.
Maybe the best summer ever…
I am really enjoying this ability to tell stories and make them into books all by myself! A lot of my last few years have been spent researching and writing a story, and in the back of my head I was always wondering… “How is anyone going to see this?” Well, maybe I have solved my problem. We’ll see.
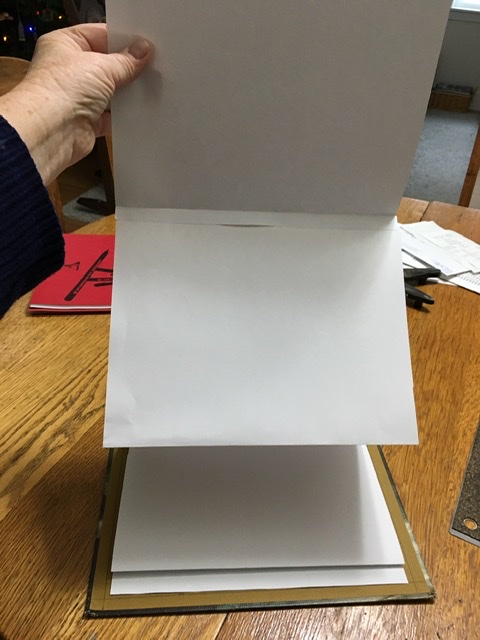
Once I had the main shape and look of my art journal, I set it aside to let my nerves settle. Doing too much fiddly detail work gives me the heebie jeebies.
The next day I set out to make the journal pretty and ready to use. I glued the first page down to the the inside of the front cover, and the last page to the inside of the back cover. This makes the whole thing very sturdy and more all-of-a-piece.
First page glued down to inside front cover…
When these had dried, I saw that the pages pulling against the cover had bent the cover a bit, making it rounder at the spine than it had been. This was unexpected, but I don’t mind it. I have seen some old books with this, and now I know why!
A little rounder on the spine…
I realize now that I forgot a part here. I was supposed to poke holes in the front and back cover to put in a closure, like a ribbon, to tie and keep the journal closed. Having missed that bit, I figured out an alternative.
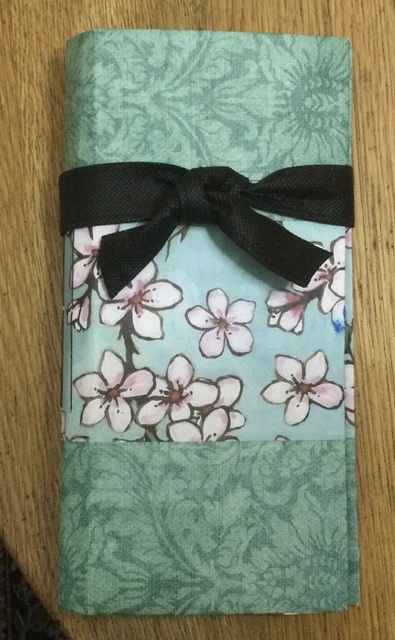
Meanwhile, I got some more pretty paper from Auntie Bridgett’s cupboards and glued them over the inside front and back covers to make them pretty and fit my theme. Since I am going to use this journal to record everything about my garden this summer, there are flowers, butterflies, and birds.
And with the book finished, I can write and create in it and not worry about losing information and Art about my garden.
Here is my Plan B closure. Auntie Bridgett was trimming the handles off an old tote bag, and I liked the look of the crisp black bow tie against the pastels of the cover!
It is still cold out and there is even some snow on the ground, but my imagination is already on its way to summer!
I have been doing lots of art in Journals lately. These have been store-bought sketch books or notebooks that Auntie Bridgett gave me.
But now, my friend Ruth Inman (ruthinmanart.com) has been teaching me how to make my own! Yes, books from scratch! And since I love books and cheap art supplies and I hate throwing things away, I am loving it!
Front and back covers, with flexible spine already glued on
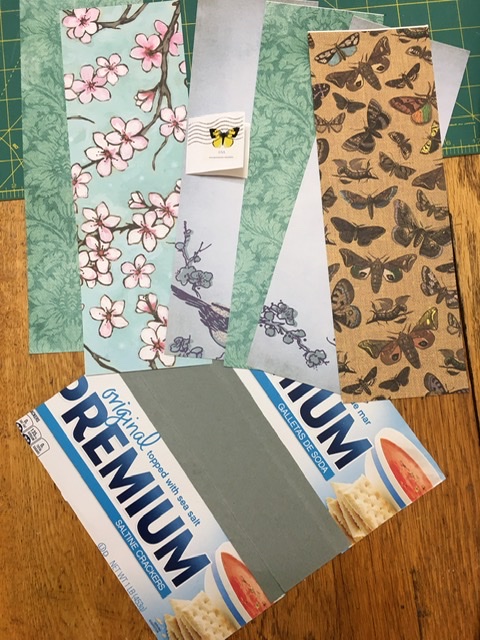
The one I am working on now is going very nicely. I started out with a saltine cracker box for the cover, a lighter weight cover from a drawing tablet for the flexible spine, and some collage-y paper from Auntie Bridgett’s boxes for pretty.
Once I got the cover glued together and decorated, I made ‘signatures’ from odd pieces of art paper, printer paper, and card stock. These can be any size that fits inside the cover. Signatures are folded sets of four sheets of paper that make the pages of the book. There is a lot of trimming to get this part right, so I used a cutting mat, a metal ruler, and an exacto blade.
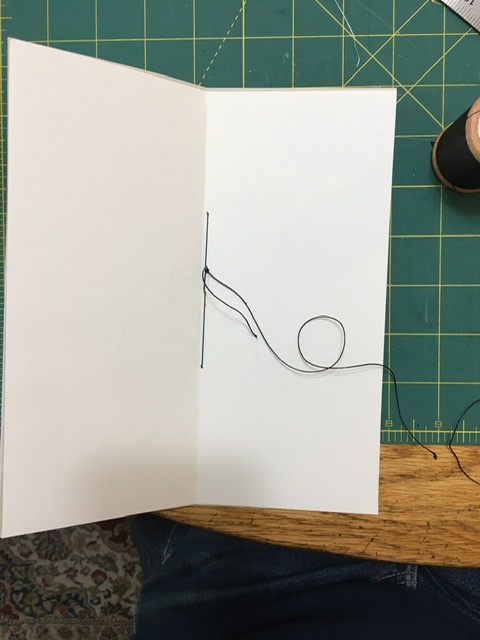
Then comes the tricky bit. I measured each signature to find the center, and poked three tiny holes (I used manicure scissors) along the fold. Using heavy button thread, I sewed the pages of each signature together along these holes, making sure all the signatures had holes in the same place.
Three hole binding for the signatures
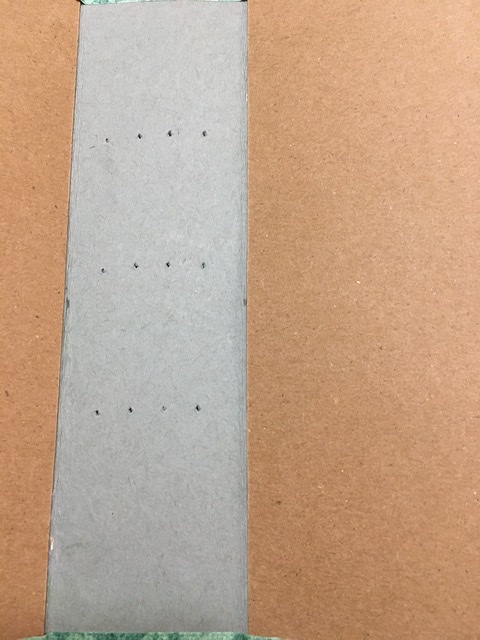
Since my book had a wide spine, I poked holes for four signatures. Again, I was super careful to measure so the holes lined up with the signatures, and also were evenly spaced back to front.
Spaces for four signatures, at three holes each.
The next part was frustrating, because it felt like I needed extra hands! But once I slowed down and took it easy, it was do-able. Using the button thread, I stitched each signature through its own set of holes in the spine, tying a tight double knot to hold each signature in.
And this is what it looked like! It is actually a book! I am so excited!
Threads that hold the signatures in
Of course, there is more to do before it is just right. I will show you that tomorrow!